This short tutorial should see you through the basic steps necessary to create a web application that can run inside the Little Portal Gizmo web application container. Before starting you have to set up a development workspace containing the Gizmo plug-ins. For details on how, see page Getting Ready for Development with the Gizmo.
Make it an Eclipse plug-in project:
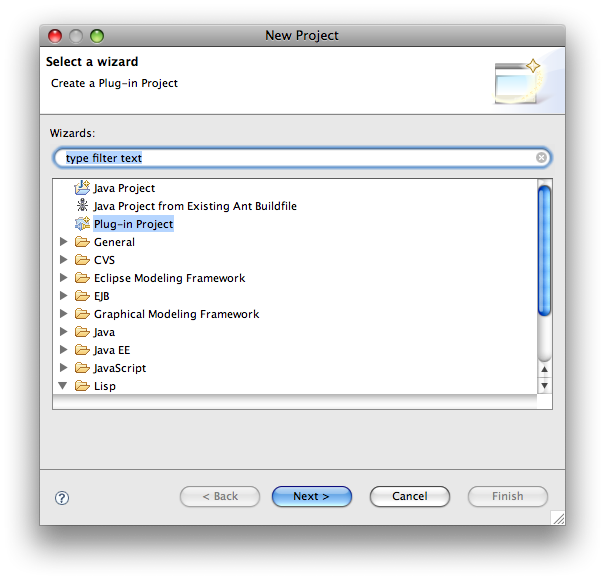
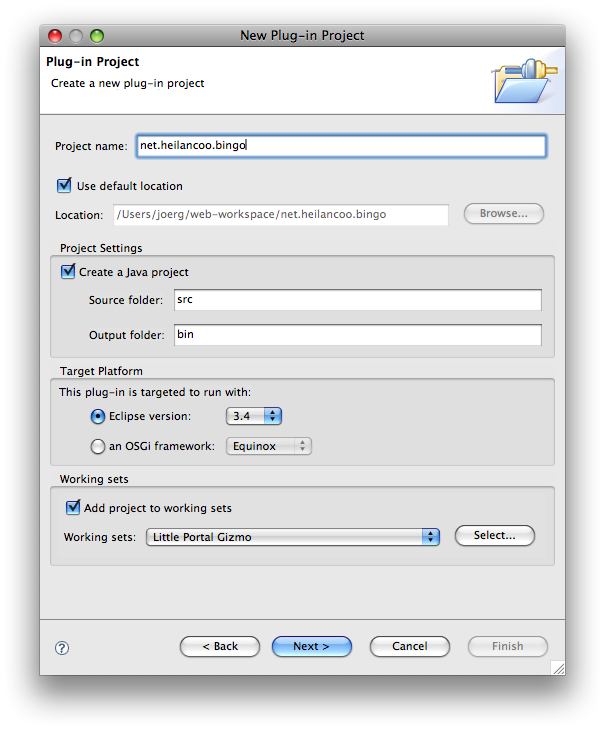
Pick a good project and create a new working set called "Little Portal Gizmo":
Give the activator a proper name: "net.heilancoo.bingo.BingoPlugin"
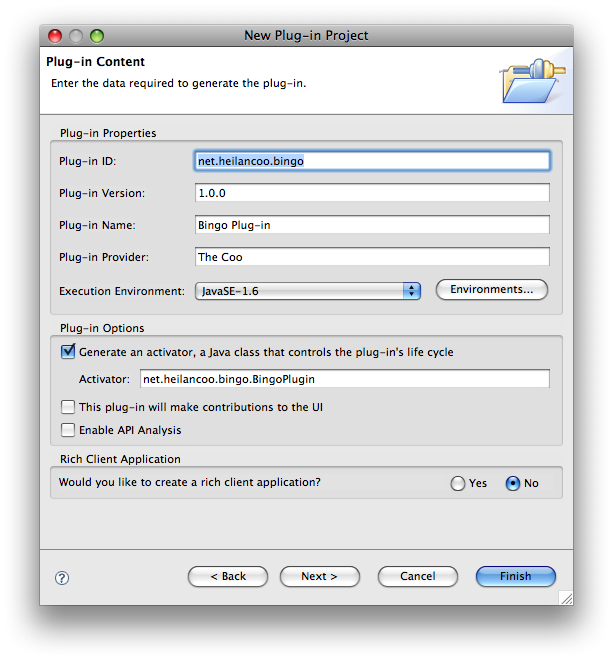
Do NOT use any of the given templates:
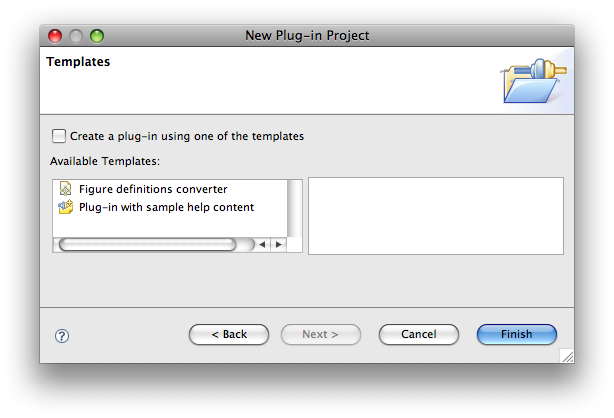
After clicking finish here, you'll be directed on to the new project's manifest editor. Continue there with the following steps...
Make sure "this plug-in is a singleton":
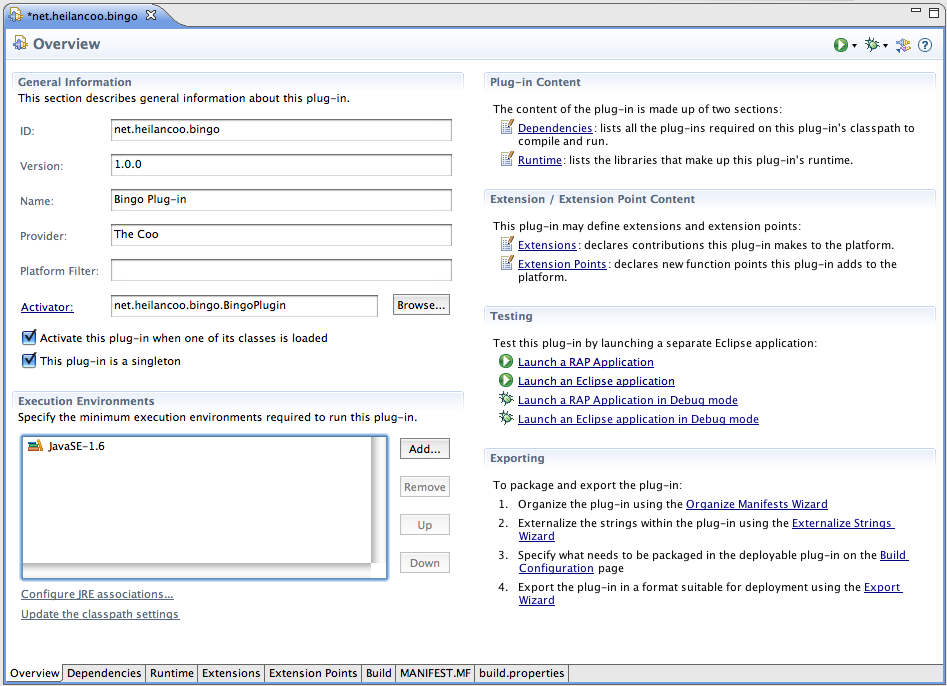
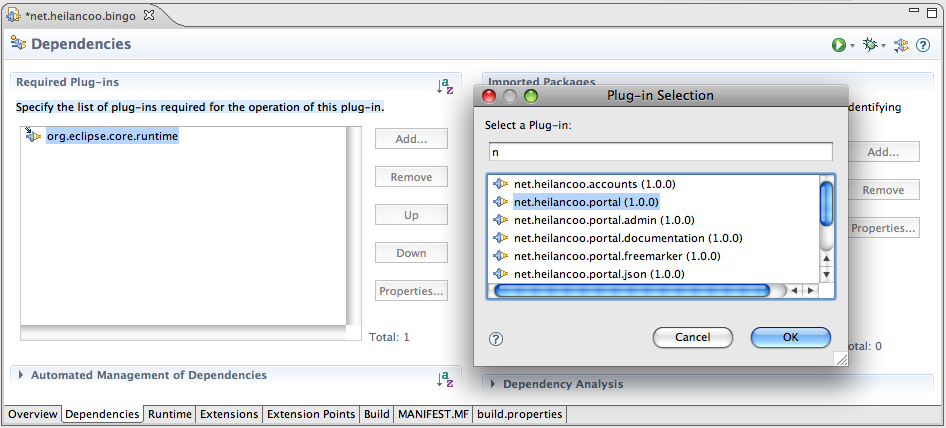
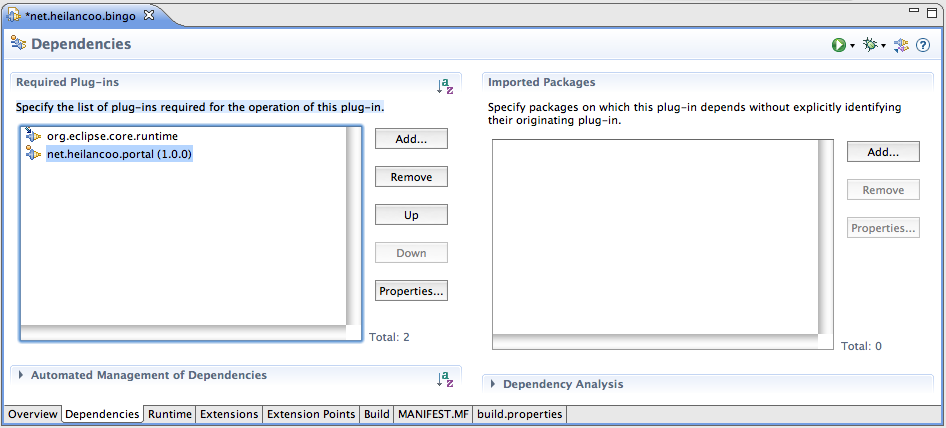
Add a dependency on "net.heilancoo.portal". Select the "Dependencies" tab at the bottom edge of the manifest editor. Then click the "Add..." button in the "Required Plug-ins" area. A dialog will pop up. In there, select plug-in "net.heilancoo.portal" and click "OK":
... and this is what you end up with:
Select the "Extensions" tab at the bottom edge of the manifest editor. Then click the "Add..." button in the "All Extensions" area. A dialog will pop up. In there, select extension point "net.heilancoo.portal.webapp".
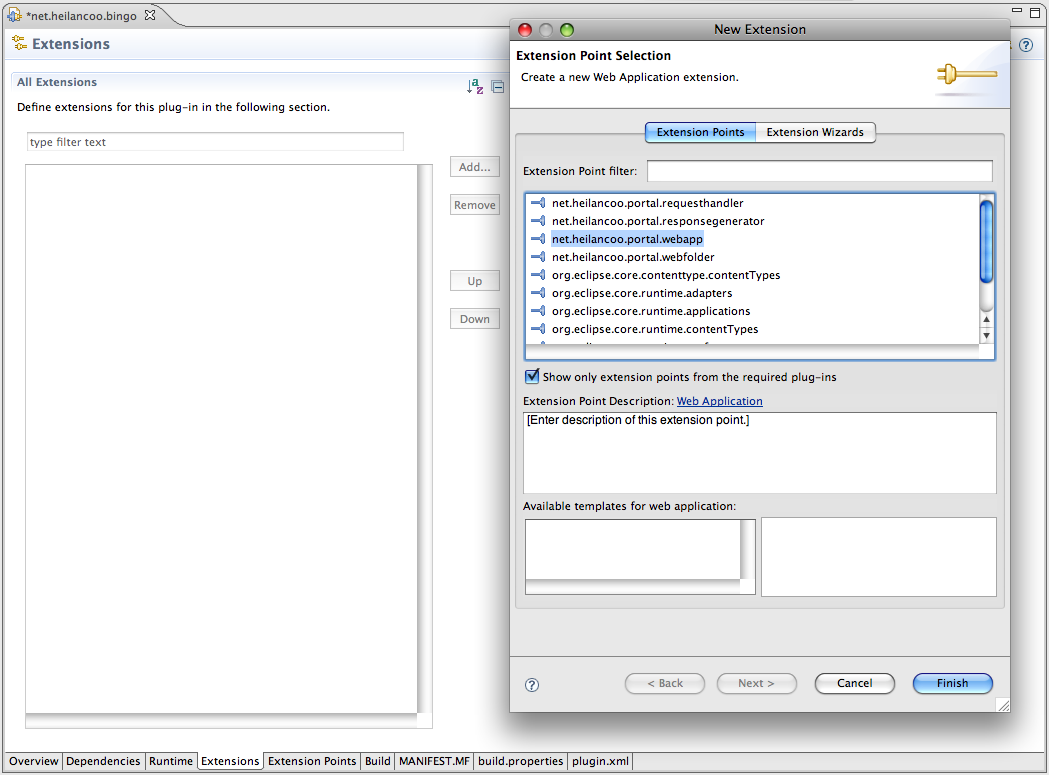
Clicking "Finish" in the dialog, you'll get back to the manifest editor and show the extension point "net.heilancoo.portal.webapp" in the extension points list:
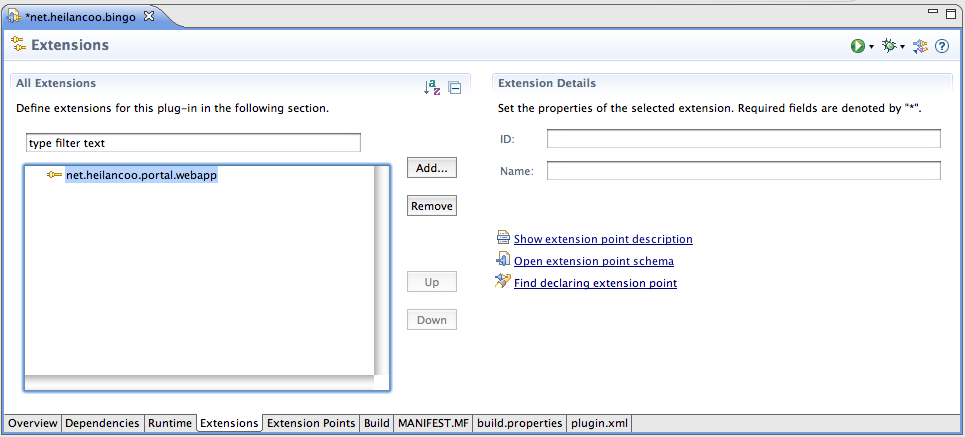
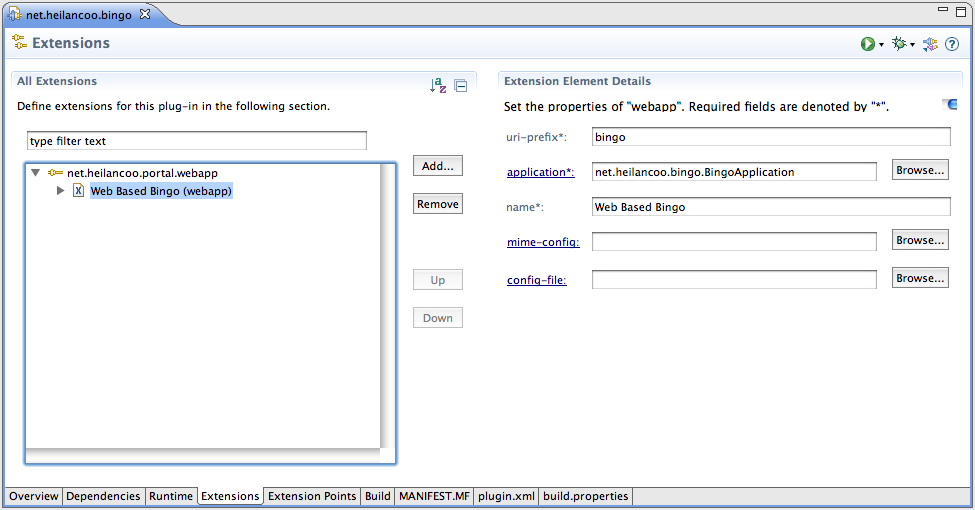
In the "All Extensions" area, right-click item "net.heilancoo.portal.webapp". In the resulting pop-up menu select "New > webapp." A new "webapp" extension instance will show in the extension list. Select this instance, shown as "(webapp)" underneath the "net.heilancoo.portal.webapp" extension point in the extension list. Now the "Extension Element Details" area on the right will show the fields "uri-prefix," "handler," "name" and "mime-config."
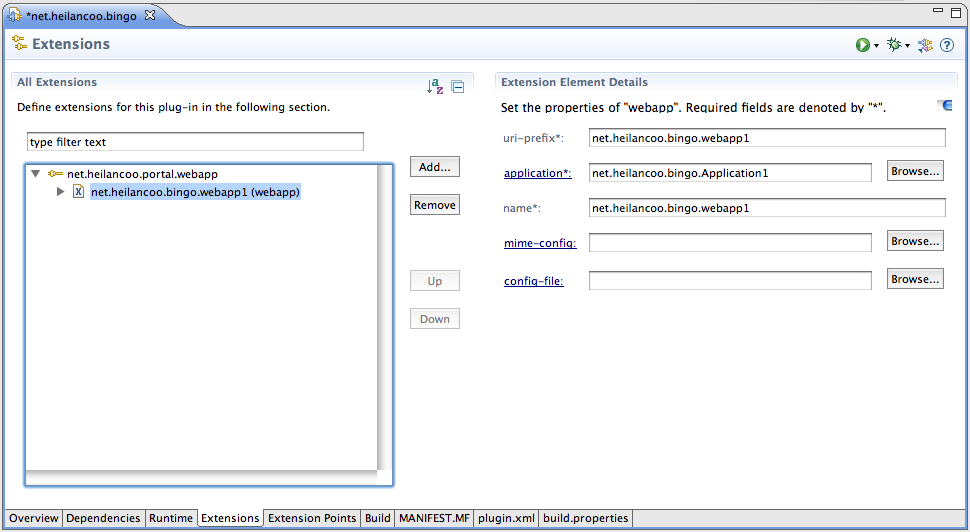
Click on the "application" link to create a new web application class.
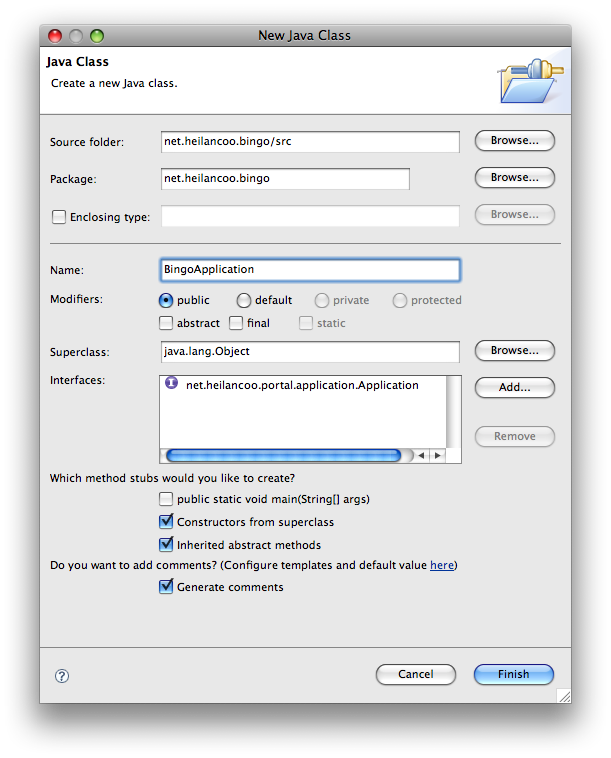
Click "Finish" in the application class creation dialog. Then, back in the extension editor, choose a URI prefix for your web app, like e.g. "bingo" and a human readable name such as "Web Based Bingo." You can leave the "mime-config" and "config-file" fields empty.
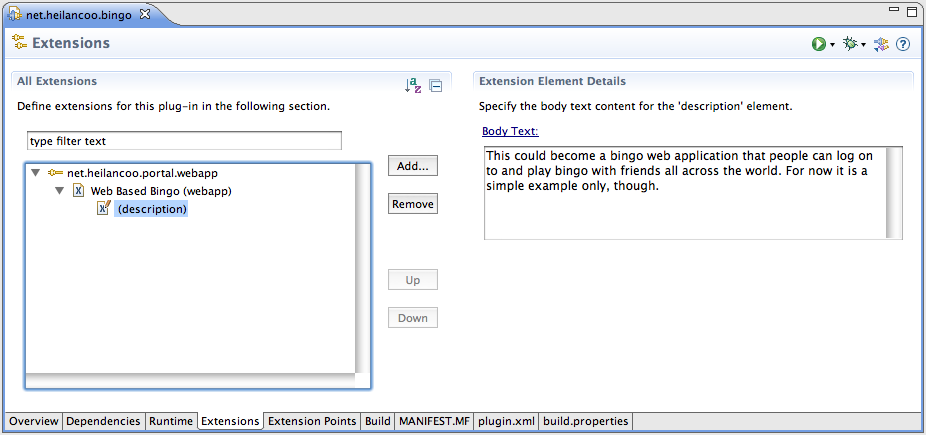
Click on the exposure triangle next to the "(webapp)" extension instance in the extension list. This exposes the extension configuration field "(description)". Select it and enter some descriptive text for your web application in the "Extension Element Details" area on the right.
Now we are ready for a basic dry run. First make sure all files you have edited or that have been created along the way are saved.
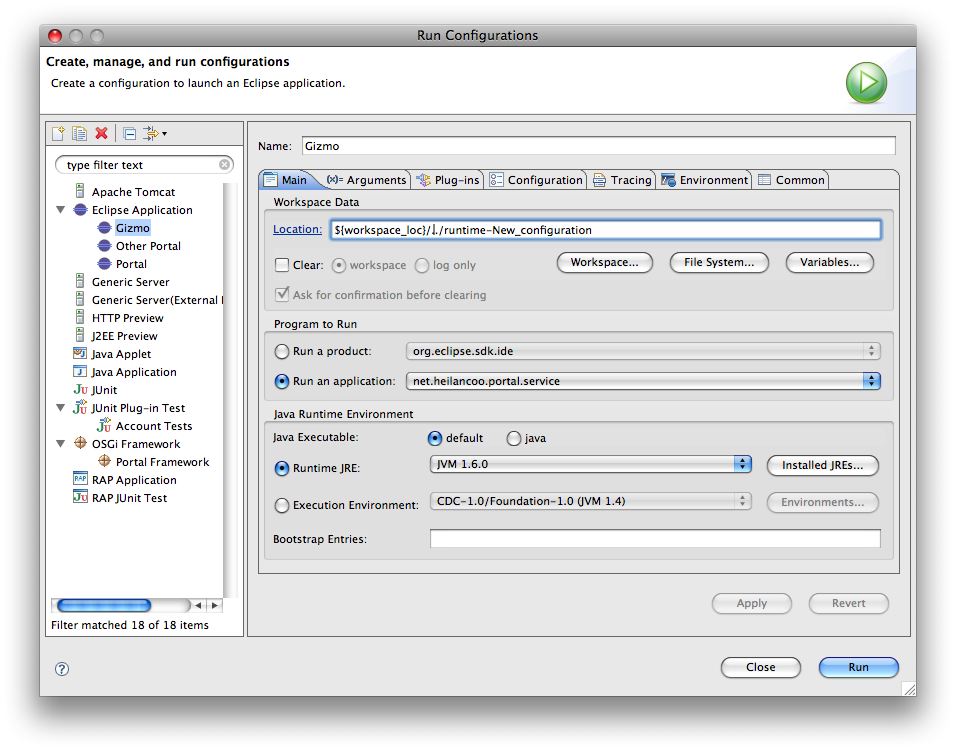
To start the Gizmo with your web application in it, we need to set up a run configuration. So
let's create one using the menu item "Run > Run Configurations ...". In the dialog that then pops up
right-click the run configuration kind "Eclipse Application" towards the top of the list and then
select "New" from the pop-up menu. Name your configuration "Gizmo." Make it "Run an Application" and
select "net.heilancoo.portal.service" from the pop-up list.

Select the "Plug-ins" tab. In the "Launch with" pop-up, select "plug-ins selected below only." De-select the "Target Platform" item.
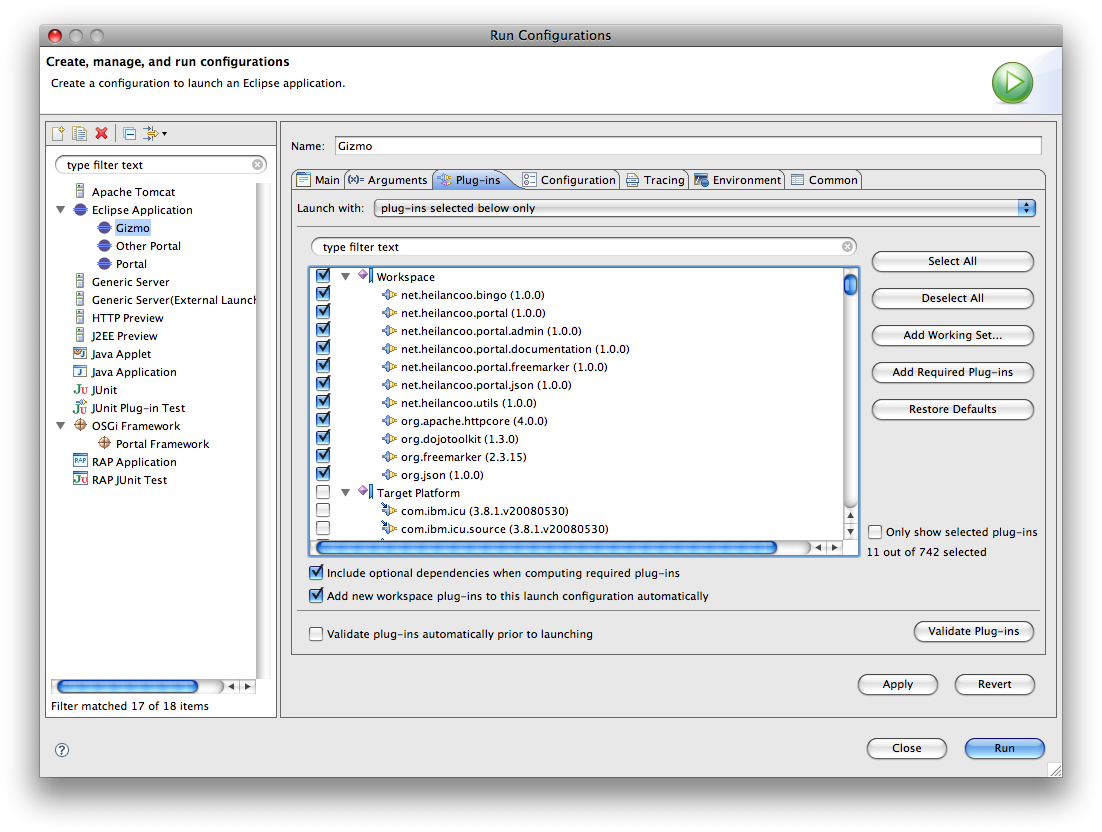
Click the "Add Required Plug-ins" button on the right. A small number of the target platform plug-ins will be re-added. Make sure you check the "Validate plug-ins automatically prior to launching" option. Click "Apply."
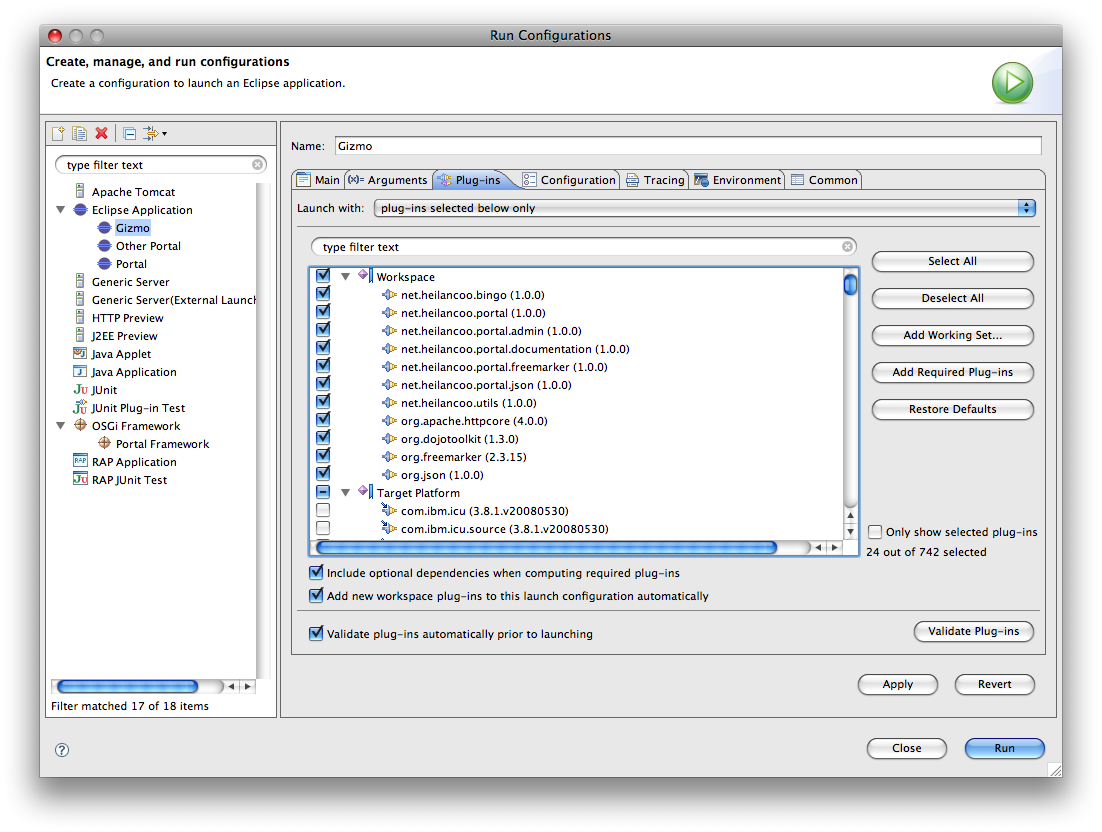
Do NOT close the launch configuration dialog.
Press "Run" in the launch configuration. In the console you should see something along the lines of the following log output.
2009-04-02 19:21:16.213 INFO Activating net.heilancoo.portal
2009-04-02 19:21:16.214 INFO Preparing HTTP service.
2009-04-02 19:21:16.220 INFO Response generator net.heilancoo.portal.responses.PlainResponder
2009-04-02 19:21:16.223 INFO Response generator net.heilancoo.portal.freemarker.FreeMarkerResponder
2009-04-02 19:21:16.225 INFO Response generator net.heilancoo.portal.json.JsonResponder
2009-04-02 19:21:16.228 INFO net.heilancoo.portal.admin: mapping / to handler net.heilancoo.portal.admin.AdminHandler
2009-04-02 19:21:16.275 INFO net.heilancoo.bingo: mapping bingo to web app handler net.heilancoo.bingo.BingoHandler
2009-04-02 19:21:16.279 INFO net.heilancoo.portal.admin: mapping adminfiles to private dir /Users/joerg/web-workspace/net.heilancoo.portal.admin/statics/
2009-04-02 19:21:16.279 INFO net.heilancoo.portal.documentation: mapping portaldocs to private dir /Users/joerg/web-workspace/net.heilancoo.portal.documentation/doc/
2009-04-02 19:21:16.279 INFO org.dojotoolkit: mapping dojo to private dir /Users/joerg/web-workspace/org.dojotoolkit/inc/dojo/
2009-04-02 19:21:16.280 INFO org.dojotoolkit: mapping dojox to private dir /Users/joerg/web-workspace/org.dojotoolkit/inc/dojox/
2009-04-02 19:21:16.280 INFO org.dojotoolkit: mapping dijit to private dir /Users/joerg/web-workspace/org.dojotoolkit/inc/dijit/
2009-04-02 19:21:16.283 INFO Starting HTTP service.
The Gizmo is listening for incoming connections on the loopback interface (127.0.0.1) on port 8080. Point your browser to it!
You should see an application list like this one:
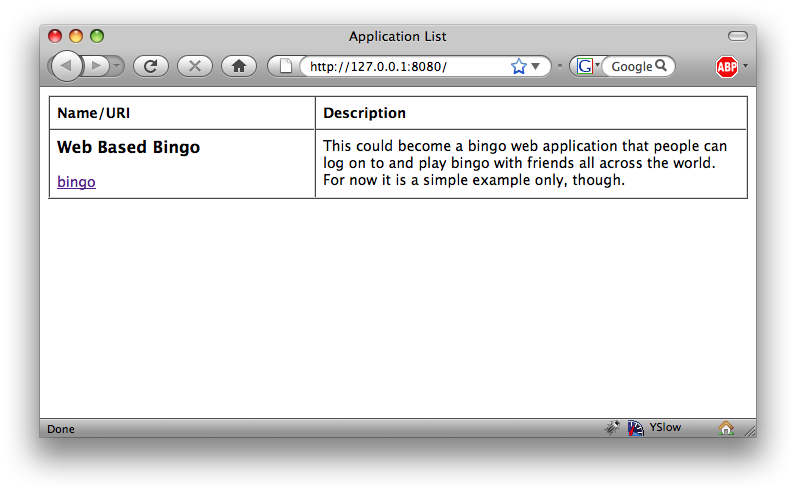
Clicking the "bingo" link should get you to the login page for the "bingo" web application. Enter some data there and try.
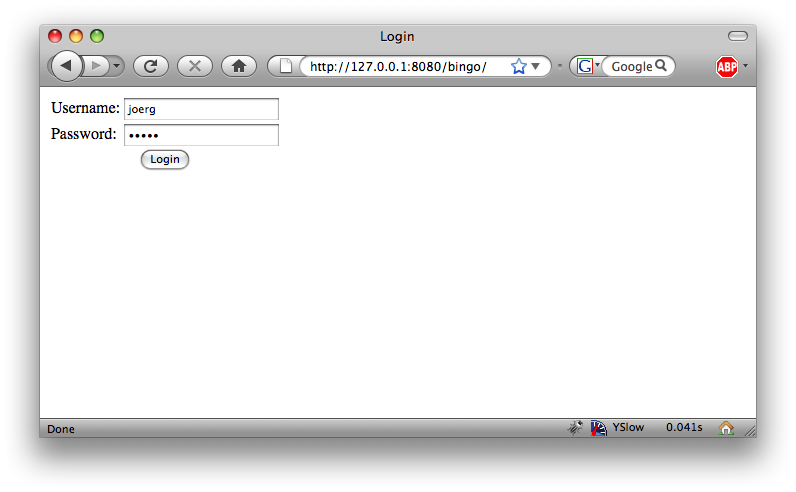
You'll get this:
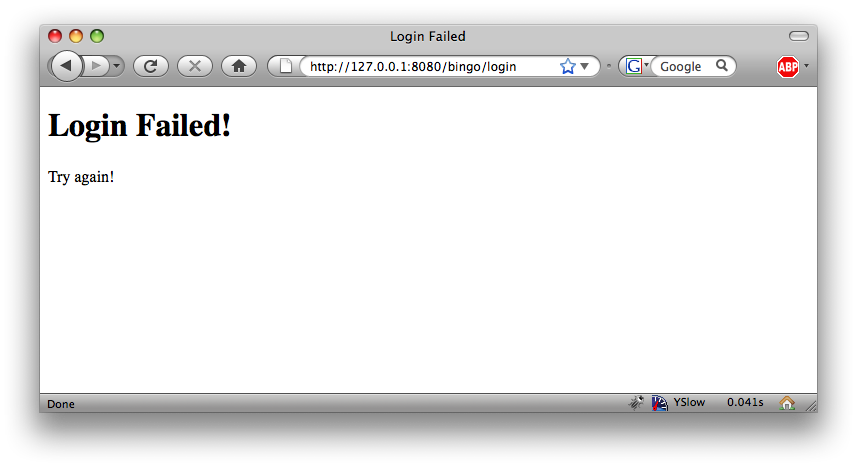
That's how far we will get here now. To make it further, you'll have to go back to your web app and add some code or resources.
You can stop the Gizmo in Eclipse now. Alternatively you can have a look at the Gizmo's documentation served right through the Gizmo itself: just point your browser to http://127.0.0.1:8080/portaldocs. Once you're tired of this, do stop the Gizmo before you continue on in this guide.
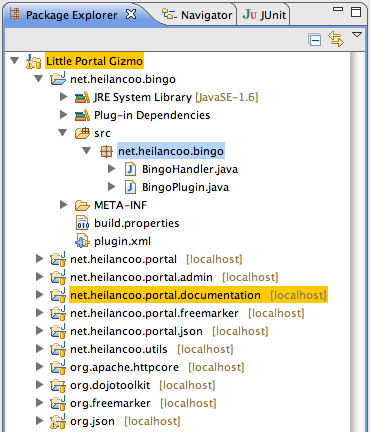
Look at the Eclipse package explorer and inspect the "net.heilancoo.bingo" plugin. Open the "net.heilancoo.bingo" package and then right-click on the package. In the pop-up menu select "New > Class."
The following dialog will come up. Enter "BingoSession" as class name.
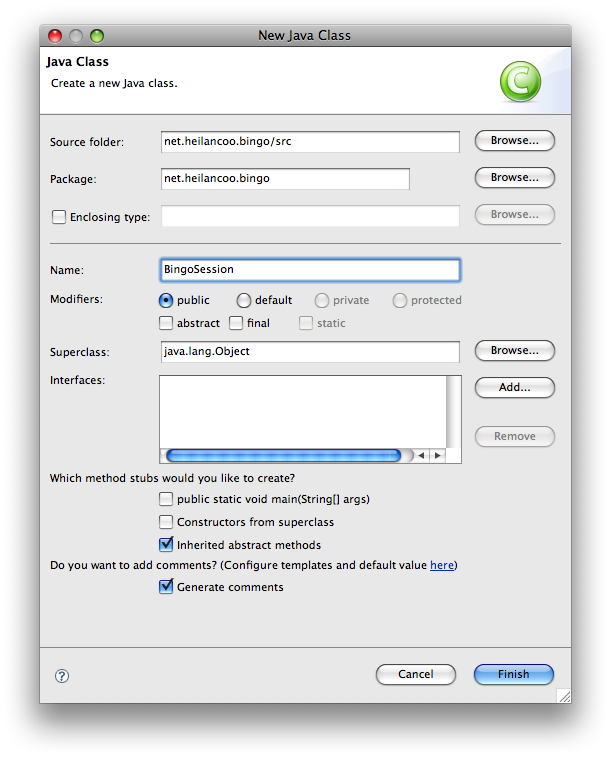
Press the "Add..." button to add an interface.
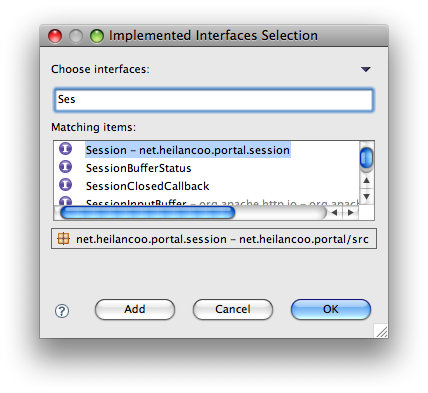
In the interface selection dialog, type "Session" into the "Choose Interface" search field. Then select the item "net.heilancoo.portal.session" in the matching items list.
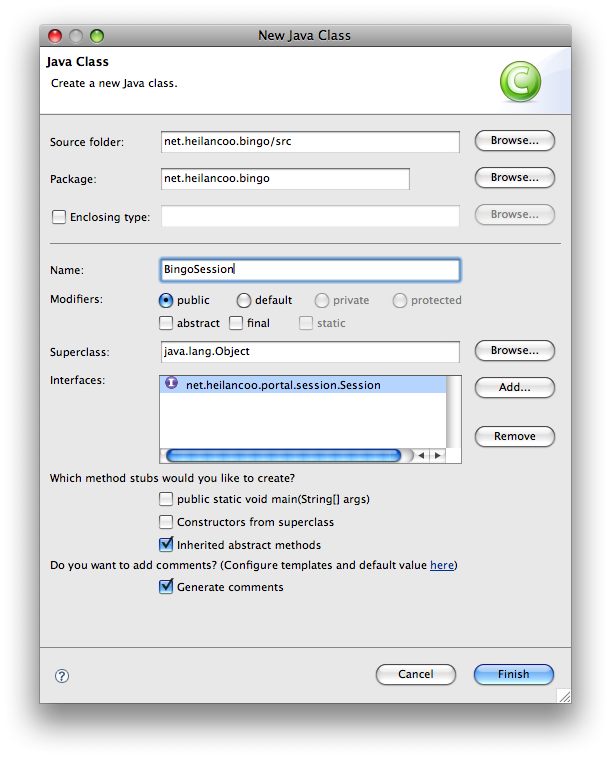
Clicking OK will lead back to the "New Java Class" dialog. Click "Finish" there and the "BingoSession" class will be created and opened in a text editor. This file will look like this:
public class BingoSession implements Session {

}
Fill this class with life. You'll add a constructor to create BingoSession objects. Then add a request handler method "main" and mark it with the "@Request" annotation. This method will be called when the tail of the URI (the bit after the session key in the URI path) is "main." TheURI tail "main" is the start entry point of all Gizmo web apps. Upon successful login/session creation, the method "main" is called. In our case it does something very very simple and just generates a snippet of HTML.
public class BingoSession implements Session {

    private static final Logger logger = Logger.getLogger(BingoSession.class);

    private static long [] sessionCounter = { 0 };
    private final String user;
    private final long serial;

    public BingoSession(String user) {
        this.user = user;

        synchronized(sessionCounter) {
            this.serial = (sessionCounter[0]++);
        }
    }

    @Request
    public void main(HttpRequest request,
                     FormFieldContainer fields,
                     HttpResponse response) {

        try {
            String encoding = "UTF-8";

            NStringEntity body = new NStringEntity(
                "<html><body><h1>Session for " + user + "</h1>" +
                "<p>serial " + serial + "</p></body></html>");

            body.setContentType("text/html; charset=" + encoding);
            response.setEntity(body);
        }
        catch (UnsupportedEncodingException e) {
            logger.error(e, e);
        }
    }
}
Open the file BingoApplication class. It'll look like this:
public class BingoApplication implements Application {

    public BingoApplication() {
        // TODO Auto-generated constructor stub
    }

    @Override
    public String getVersion() {
        // TODO Auto-generated method stub
        return null;
    }

    @Override
    public void initialise(ApplicationInfo info) {
        // TODO Auto-generated method stub
    }

    @Override
    public Session validateCredentialsAndMakeNewSession(
            FormFieldContainer fields) throws FormFieldAccessException {
        // TODO Auto-generated method stub
        return null;
    }
}
Change the class:
The class should then look like this:
@ValidSessions({ BingoSession.class })
public class BingoApplication implements Application {

    public BingoApplication() {
        // TODO Auto-generated constructor stub
    }

    @Override
    public String getVersion() {
        return "1.0";
    }

    @Override
    public void initialise(ApplicationInfo info) {
        // TODO Auto-generated method stub
    }

    @Override
    public Session validateCredentialsAndMakeNewSession(
            FormFieldContainer fields) throws FormFieldAccessException {
        String user     = fields.getStringValue("user");
        String password = fields.getStringValue("password");

        if(user != null && password != null && user.equals(password))
            return new BingoSession(user);

        return null;
    }
}
Start the Gizmo. Go to the browser. Open a few tabs and log into the bingo app twice. You'll see that each session has it's own serial counter which is stored in the session. Refresh each session and see the serial counters of the two sessions not interfere.
So far the bingo web app is rather simplistic. The only method it has is generating its HTML output the hard way, embedding it right there in the Java code. We'll now use a FreeMarker responder to help us generate the HTML output.
Make the "net.heilancoo.bingo" plug-in depend on "net.heilancoo.portal.freemarker" by adding the latter to the dependencies list in the manifest of the former. Save the manifest file.
Create a folder "templates" inside the "net.heilancoo.bingo" plug-in as a sibling to the "src" folder.
Inside the "templates" folder create a file named "main.html" — sharing the name stem with the BingoSession's request handler method. That's how it looks in the Eclipse package explorer:
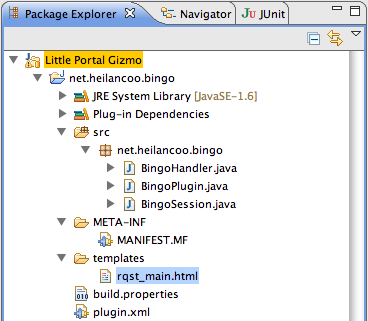
This is how the file content of "main.html" should look like:
<!DOCTYPE html PUBLIC "-//W3C//DTD HTML 4.01 Transitional//EN" "http://www.w3.org/TR/html4/loose.dtd">
<html>
<head>
<meta http-equiv="Content-Type" content="text/html; charset=UTF-8">
<title>This is ${user}</title>
</head>
<body>
<h1>My Session</h1>
<p>user = ${user}</p>
<p>serial = ${serial}</p>
<p>access count = ${access}</p>
</body>
</html>
Change class BingoSession so it ends up like this:
public class BingoSession implements Session {

    private static long [] sessionCounter = { 0 };
    private final String user;
    private final long serial;
    private long accessCounter;

    public BingoSession(String user) {
        this.user = user;
        this.accessCounter = 0;

        synchronized(sessionCounter) {
            this.serial = (sessionCounter[0]++);
        }
    }

    public long getAccessCounter() {
        return accessCounter;
    }

    @Request
    public void main(FormFieldContainer fields, FreeMarkerModel model) {
        accessCounter += 1;

        model.put("user", user);
        model.put("serial", new Long(serial));
        model.put("access", new Long(accessCounter));
    }
}
Note the parameter list change of the main(...) method.
Make sure everything is saved.
Restart the Gizmo. Point the browser at it, log in a few times (in parallel tabs) and (hopefully) see how the sessions keep state independently by hitting the refresh button a few times. This time there's even an access counter.
That's it for now.